
Navigating the complexities of construction projects requires not just skill but also the right paperwork. The Contractor Warranty Form, including Subcontractor Warranty Form documents, plays a pivotal role in ensuring all parties are clear about the quality and standards expected. This guide dives deep into the essentials, offering templates, examples, and legal insights to secure your work with confidence. Whether you’re a contractor or subcontractor, understanding the nuances of warranty forms is key to project success.
Download Contractor Warranty Form bundle
What is the Contractor Warranty Form?
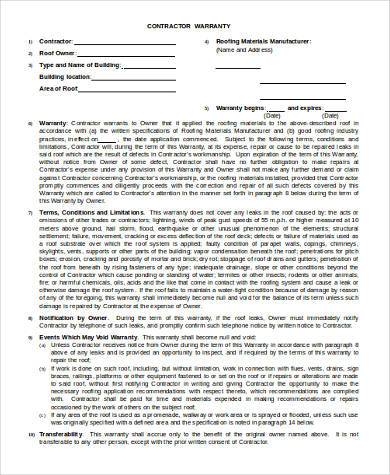
A Contractor Warranty Form is a legally binding document that contractors provide to their clients, guaranteeing the quality and durability of the work performed. It outlines the terms under which the contractor agrees to repair or replace certain elements of the project, should issues arise due to craftsmanship or material quality within a specified period. This form serves as a promise from the contractor to adhere to the standards and specifications agreed upon at the start of the project, offering peace of mind to both parties involved.
Contractor Warranty Form Format
Contractor Information
- Name of the Contracting Company:
[Clearly state the full name of the contracting company.] - Contact Details:
[Provide the complete address, phone number, and email for easy contact.]
Project Details
- Project Name and Location:
[Identify the project with its name and specify the location accurately.] - Client’s Name:
[Mention the full name of the client who owns the project.]
Warranty Declaration
- Scope of Work:
[Describe the work scope covered by this warranty, focusing on the specifics of the labor and materials used.] - Duration of Warranty:
[Indicate the warranty period, specifying start and end dates.] - Coverage Inclusions:
[Detail what aspects of the work are covered by the warranty, including any additional conditions or terms.] - Exclusions from Warranty:
[List any exclusions to this warranty, clearly stating what is not covered.]
Contractor’s Commitment
- [Insert a statement of commitment]
[This should include a promise from the contractor to address any defects in materials or workmanship within the warranty period.]
Validation
- Contractor’s Signature:
[Provide a space for the contractor’s signature as a sign of agreement to the warranty terms.] - Date of Issue:
[Specify the date when the warranty is issued to the client.]
Instructions for Use:
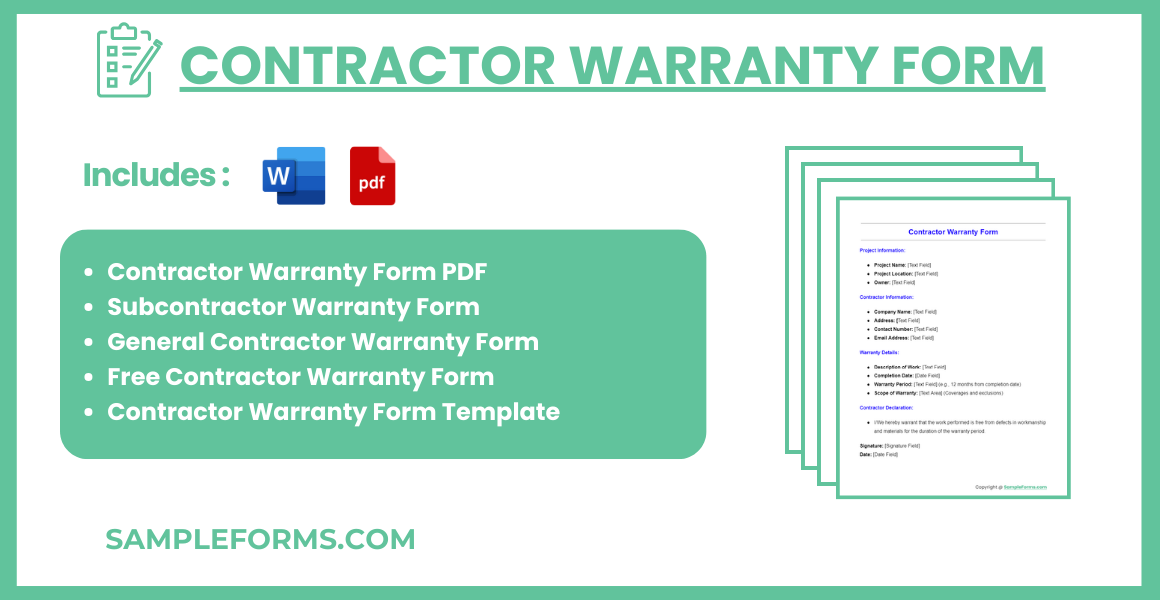
Contractor Warranty Form PDF
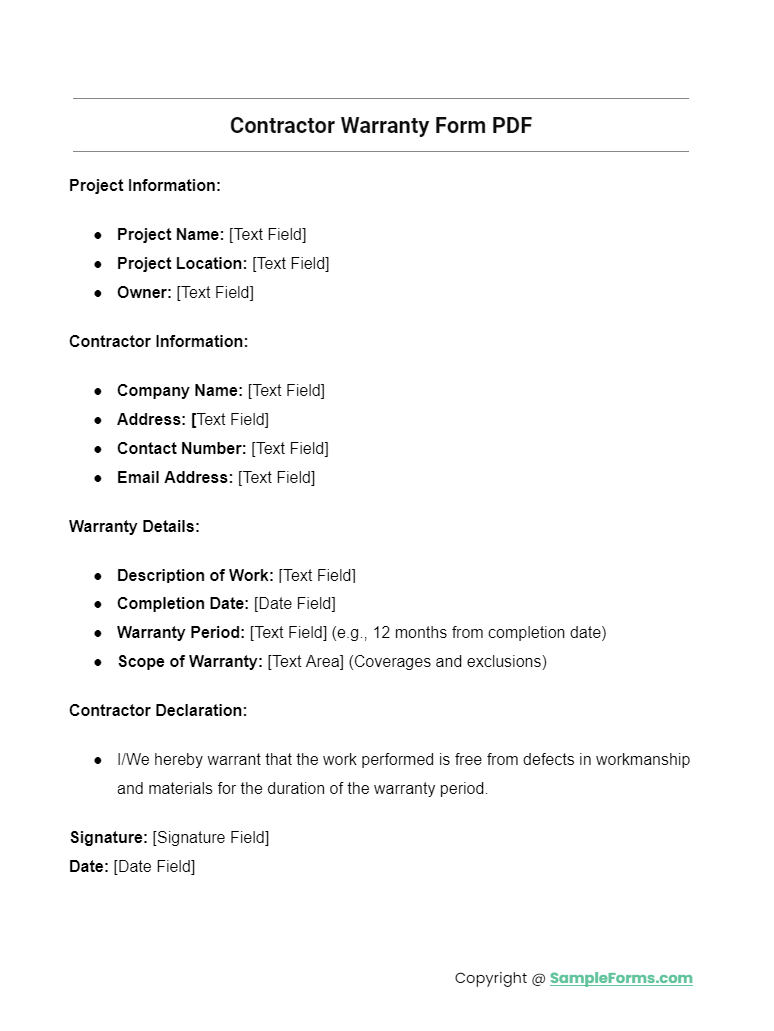
Discover the Contractor Warranty Form PDF, integrating key elements like the Electrical Subcontractor Agreement Form and Contractor Estimate Form. This document streamlines project management, ensuring clear communication and legal compliance for all electrical and estimation agreements.
Subcontractor Warranty Form
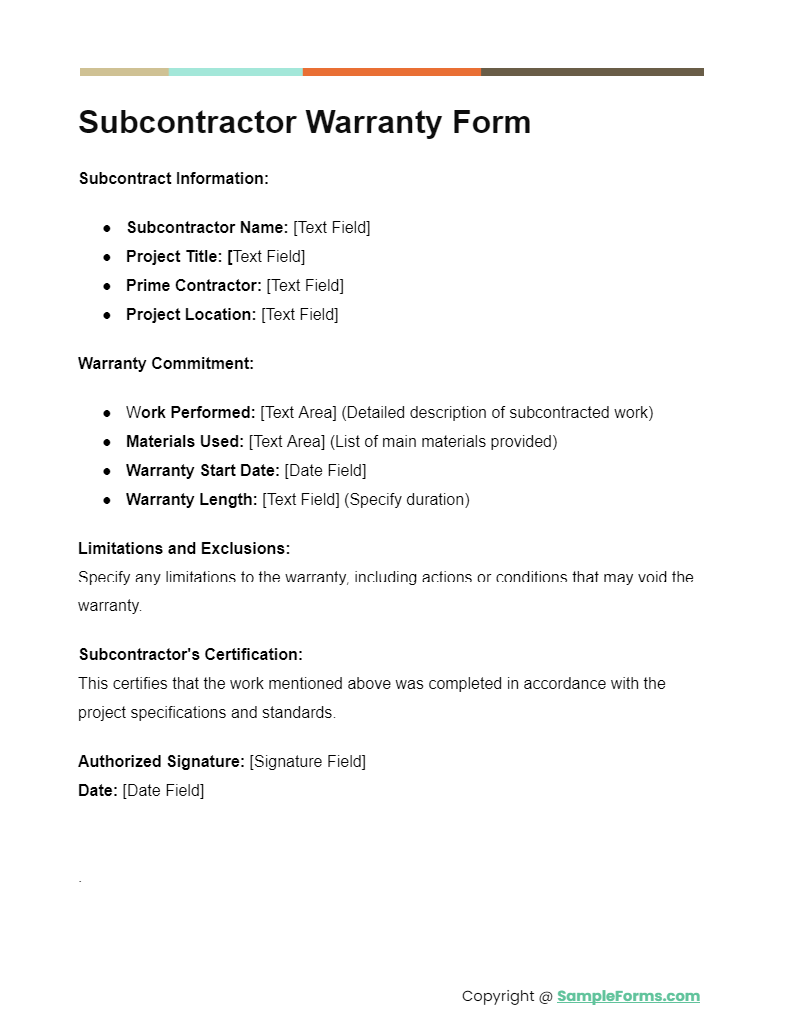
The Subcontractor Warranty Form is essential, encompassing the Contractor Contract Form and Contractor Receipt Form. It solidifies the subcontractor’s commitment to quality, providing a transparent record of services rendered and ensuring accountability in all contractual dealings.
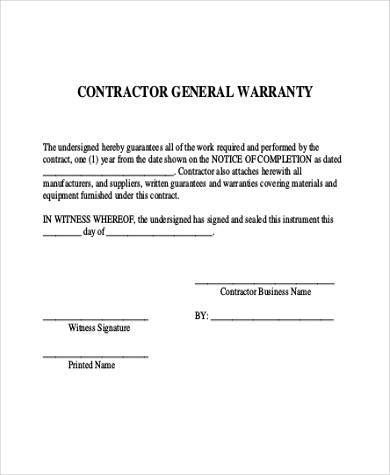
General Contractor Warranty Form
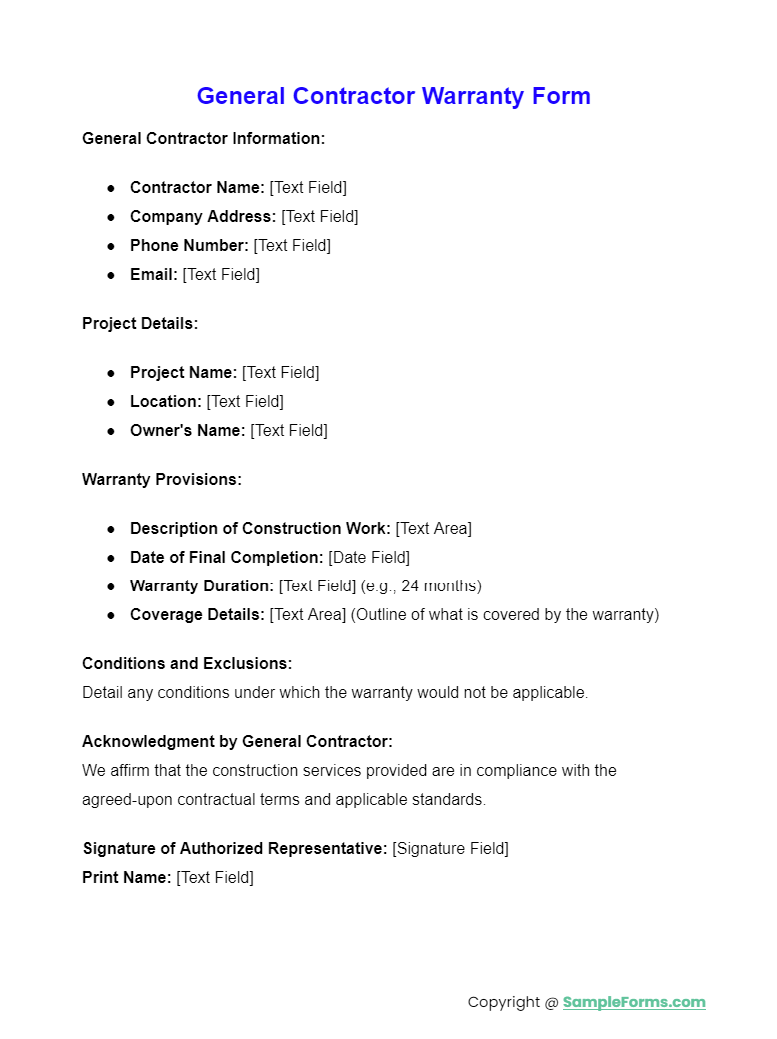
Our General Contractor Warranty Form includes critical documents such as the Contractor Affidavit Form and Contractor Payment Form. This comprehensive form safeguards project integrity, facilitating smooth financial transactions and affirming the contractor’s legal and quality assurances.
Free Contractor Warranty Form
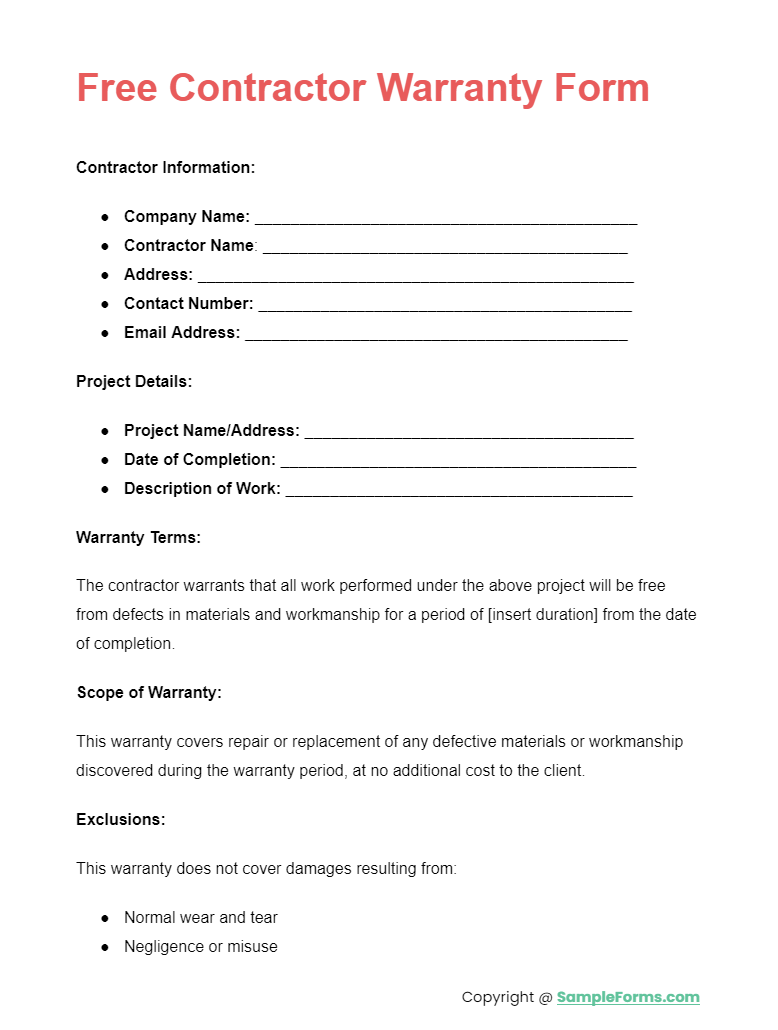
Access our Free Contractor Warranty Form, featuring the Contractor Evaluation Form and Independent Contractor Agreement Form. This no-cost resource aids in evaluating contractor performance and formalizing agreements, ensuring standards are met without financial barriers.
Contractor Warranty Form Template
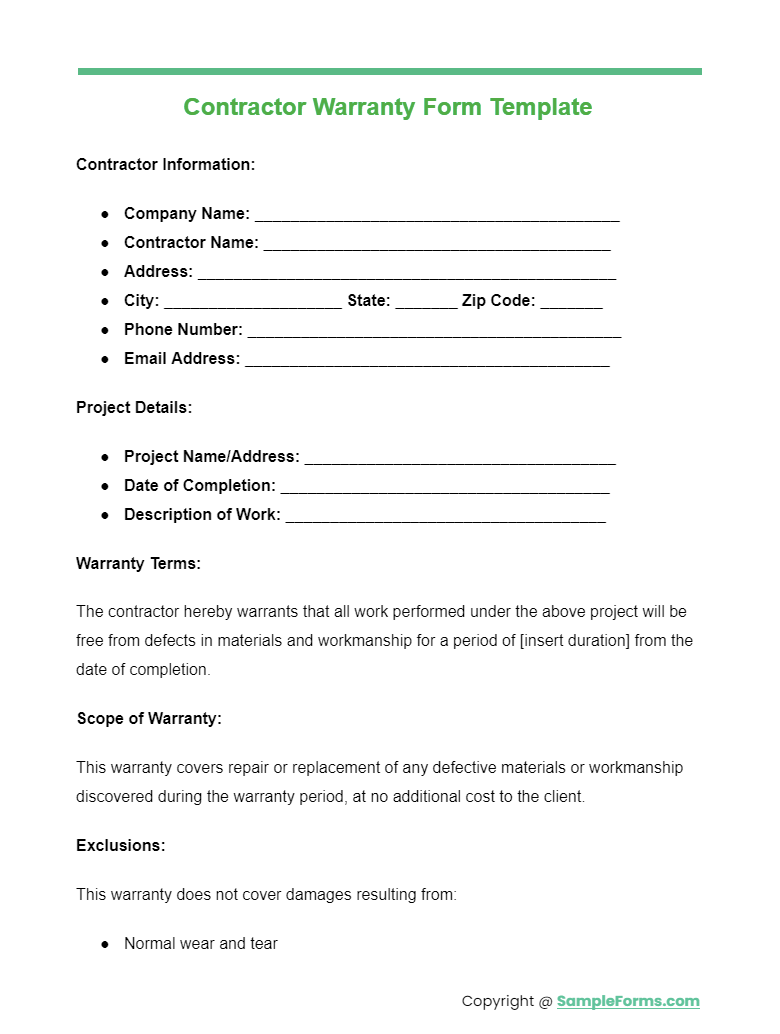
Utilize our Contractor Warranty Form Template, designed to incorporate the Contractor Bid Form and Contractor Application Form. This template is a cornerstone for bidding and application processes, streamlining project initiation and contractor selection with precision and clarity.
General Contractor Warranty Form PDF
Electrical Contractor Warranty Form
Free Contractor Warranty Form
Subcontractor Warranty Form
Contractor Warranty Form in PDF
Basic Contractor Warranty Form
Contractor Warranty Form Example
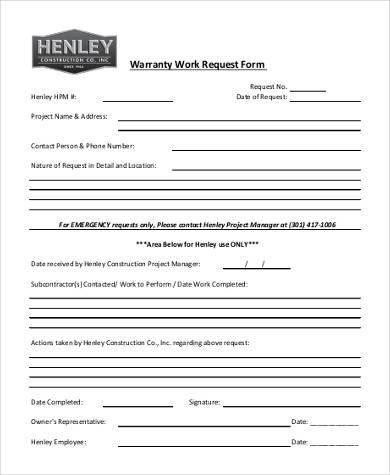
Contractor Warranty Work Request Form
Some Examples of Contractor Warranty Forms
There are lots of these forms that any person can use for whenever they need a warranty on any of the services performed and materials provided by any contractor they hired. Here are some examples:
- Contractor Wararnty Proposal Forms are the forms used to propose to the contractor the kind of warranty you’ll need for his or her services. What’s usually proposed is the type of service that should be compensated in the event that a service isn’t done properly, and the duration of the warranty. If both agree to the terms, then there should be no problem with the proposal.
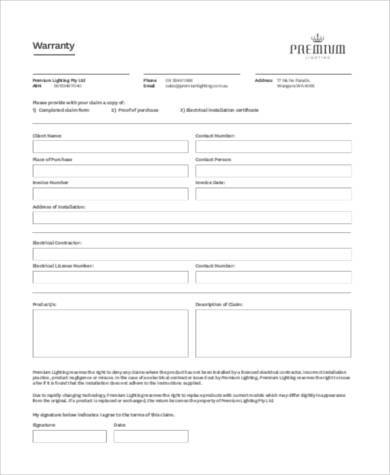
- Electrical Contractor Warranty Forms are specifically used by any person whenever they hire a contractor to provide electrical maintenance services. This is to ensure that in the event the electrical problem still occurs after a contractor has provided his or her services, then that contractor will have to compensate by providing his or her services again to ensure that the problem is finally resolved.
- Subcontractor Warranty Forms are used by contractors whenever they need a warrant on any services and materials that they asked from a subcontractor that they hire. A contractor may need professional help on certain services that they themselves can’t handle, so they hire a subcontractor to do it for them. These warranties ensure that these services provided are of the best quality.
The Importance of Contractor Warranty Forms
These forms are in the same league as Construction Contract. A bid requires that a person offers a certain price for a contractor’s service, and when that service is provided, that person will need to make sure that the contractor gives only the best kind of work equal to the money paid by having him or her sign a Construction Variation Form.
The point of these forms is to ensure that the contractor provides the best kind of service and materials for a job they are hired for. If there are problems within the span of the duration that was signed under the warranty, then these contractors will have to provide ample compensation to make up for the issues that were caused by the work they provided.
Thus, in the event that you have a job that in which you need to hire someone to work on, make sure that you have them sign off on these forms. It will help ensure you that they’ll do their absolute best and that you have a form of insurance in the event something does go wrong.
How do I Create a Warranty Document?
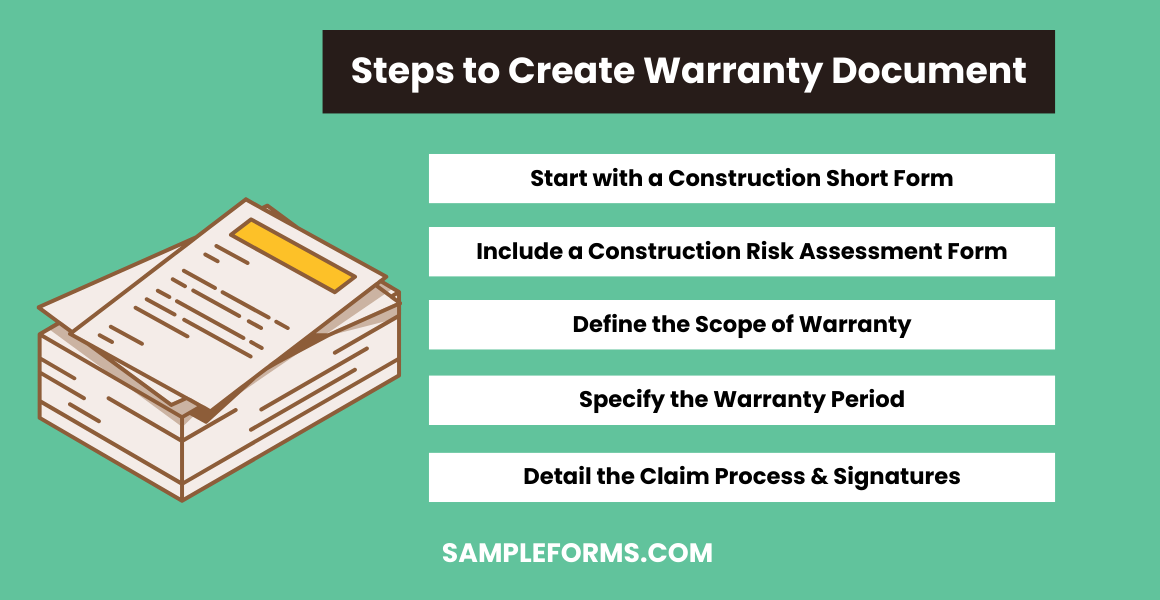
Creating a warranty document is essential for ensuring all parties understand the terms of quality and performance guarantees for construction projects. Follow these steps to create an effective warranty document:
- Start with a Construction Short Form: Begin by outlining the project details using a Construction Short Form, which provides a concise summary of the project at hand.
- Include a Construction Risk Assessment Form: Incorporate a detailed Construction Risk Assessment Form to identify potential risks and how they are covered under the warranty.
- Define the Scope of Warranty: Clearly state what is covered by the warranty, including workmanship, materials, and any specific exclusions.
- Specify the Warranty Period: Indicate the duration of the warranty, ensuring it is reasonable for both the contractor and the client.
- Detail the Claim Process: Outline how claims can be made under the warranty, including any necessary documentation and deadlines.
- Signatures: Ensure both parties sign the document, validating the agreement and its terms.
By incorporating these elements, you create a comprehensive warranty document that protects both the contractor and the client, ensuring clarity and confidence in the construction project.
How do I write a warranty agreement?
Writing a warranty agreement involves detailing the terms and conditions under which warranty services will be provided. Here’s how to draft a thorough warranty agreement:
- Begin with a Construction Application Form: Use the Construction Application Form to gather all relevant project details, serving as a foundation for the warranty agreement.
- Incorporate a Construction Management Form: Include a Construction Management Form to outline the project’s management structure and responsibilities, ensuring clarity on who oversees warranty-related matters.
- Define Warranty Coverage: Clearly articulate what is included in the warranty, such as materials, labor, and specific components of the project.
- Set the Warranty Term: Specify the length of the warranty period, providing clear start and end dates.
- Outline the Claims Procedure: Detail the process for submitting warranty claims, including required documentation, contact information, and response times.
- Limitations and Exclusions: Clearly list any limitations or exclusions to the warranty coverage to prevent misunderstandings.
- Legal Clauses: Add any legal clauses related to dispute resolution, jurisdiction, and compliance with local laws.
- Sign and Date: Have all parties involved sign and date the agreement to formalize the warranty terms.
-
Is a Warranty a Legal Document?
Yes, a warranty serves as a legal document, often accompanying a Construction Work Order Form. It legally binds the provider to their commitment on goods or services quality.
Do you Need a Receipt to Prove Warranty?
While a receipt bolsters warranty claims, integrating details into a Construction Change Order Form or Construction Safety Form can also substantiate warranty coverage.
What Happens if you don’t Register a Warranty?
Not registering a warranty, as detailed in a Construction Agreement Form, might limit access to benefits or support, potentially complicating claims or service requests.
What Makes a Warranty Invalid?
A warranty becomes invalid if terms are breached, such as misusing a product or service or deviating from specifications outlined in a Construction Bid Form.
What to do if you don t have Receipt for Warranty?
In absence of a receipt, presenting a Construction Contract Form can serve as proof of purchase or agreement, potentially supporting your warranty claim.
Related Posts Here
-
Profile Form
-
Menu Form
-
Event Planner Form
-
FREE 16+ Ticket Order Forms in PDF | MS Word | Excel
-
Employee Dress Code Policy Form
-
Rental History Form
-
Advertising Contract Form
-
Service Agreement Form
-
Income Statement Form
-
Accident Statement Form
-
Performance Review Form
-
Event Contract Form
-
Contest Registration Form
-
Waiting List Form
-
Restaurant Schedule Form